UI jumpscares
A UI jumpscare is an image that appears at a set time when triggered.
Adding smart asset
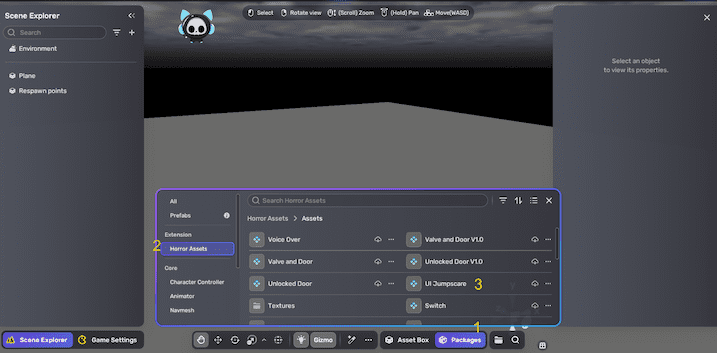
Open the Packages window. Go to Extension > Horror Assets > Assets and find the UI Jumpscare smart asset. After adding it, you can view its hierarchy in the Scene Explorer window.
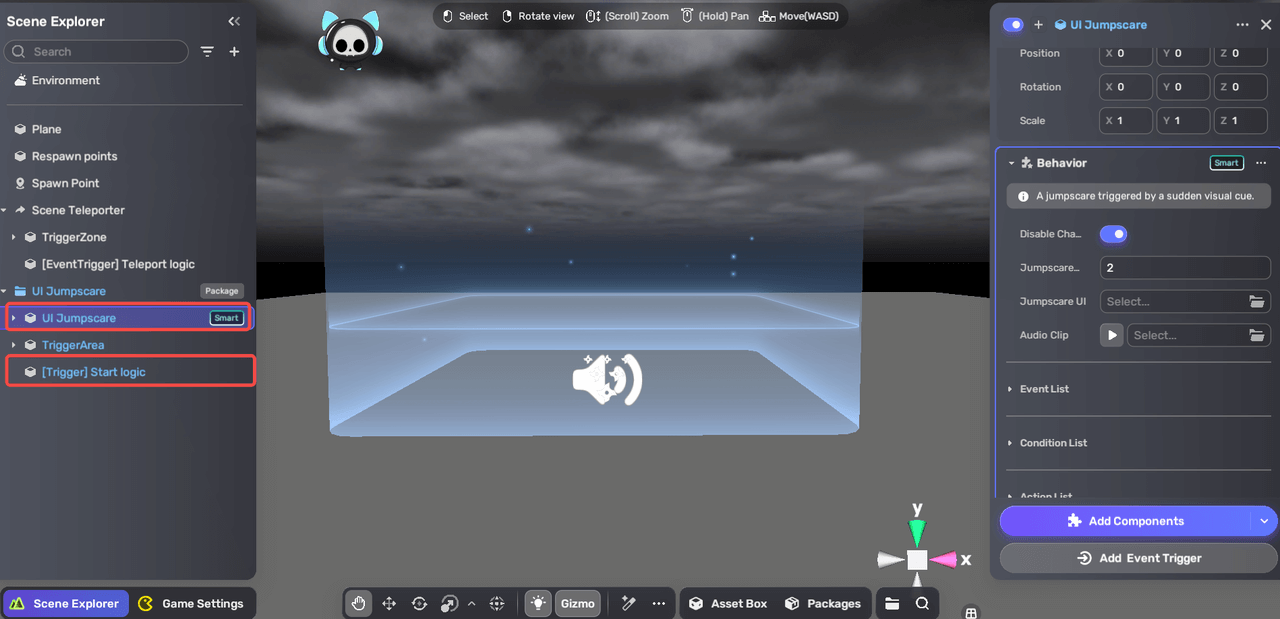
Take a look at the UI Jumpscare package. It can be mainly divided into two parts: UI Jumpscare and [Trigger]Start Logic. Feel free to explore and customize their properties to suit your needs.
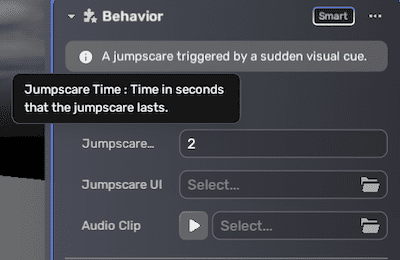
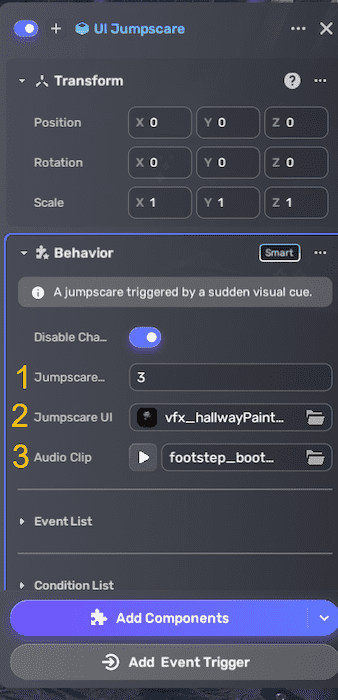
If you want to select an image for your jumpscare, simply go to the UI Jumpscare component and choose Jumpscare UI within the Behaviour component to pick your desired images. You can upload an image in PNG, JPG, or JPEG format by going to My Resource and selecting Uploaded files. For more information on this process, refer to Image Importer. In the same field, you can use Jumpscare Time to change the lasting time of the jumpscare effect, and use Audio Clip to select the background audio you want to add.
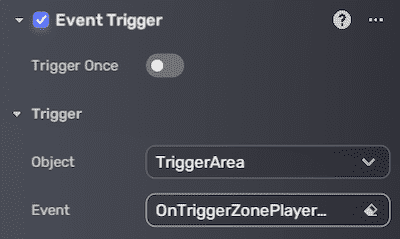
Event Trigger within the [Trigger]Start Logic is set to trigger when players enter the trigger box of the model. Once triggered, the actions you have specified will be performed. For more information on the component, see Event Trigger.
Editing smart asset
You can edit the properties of jumpscare smart assets to achieve your goals. Let's say you want to add a horrible picture with eerie audio, and you hope the image and audio will disappear after lasting for 3 seconds. Here are the steps:
-
First, select the component of UI Jumpscare labeled with Smart under the UI Jumpscare folder. Let's focus on the Behavior field on the right side of the screen. Type 3 in Jumpscare Time and use Jumpscare UI and Audio Clip to choose desired pictures and audios.
-
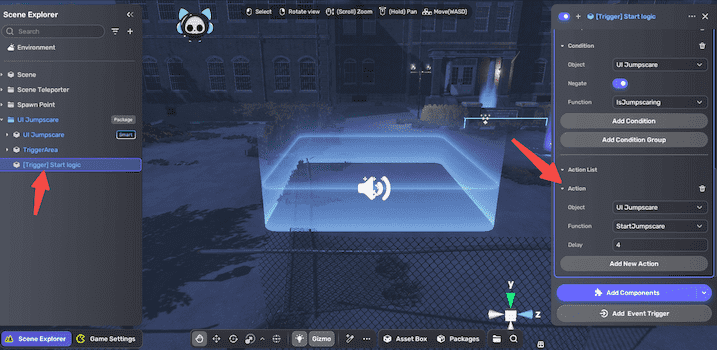
If you want to determine when the jumpscares will be triggered after the character sets foot in the trigger zone, you need to go to the component of [Trigger]Start Logic on the left side of the screen. After selecting the component, let's find Action List field on the right side of the screen. Let's set the Delay time to 4 seconds and the horrible elements we chose in the last step will appear after we enter the trigger zone for 4 seconds.
-
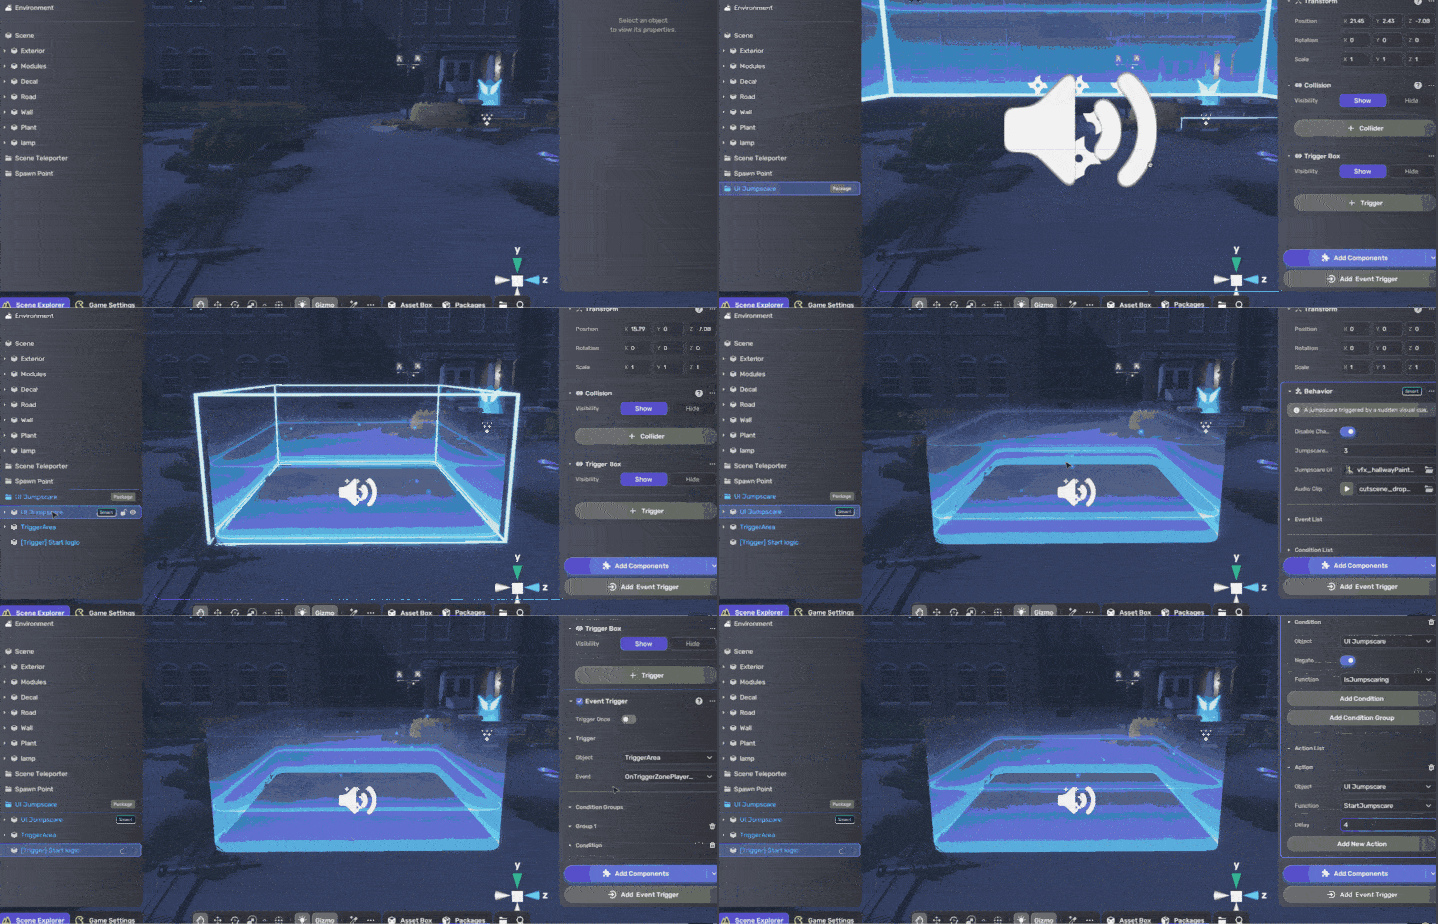
The whole process goes like this:
-
Now, it's time to playtest, we can see if we step into the trigger zone, the image will appear.
