Manage scenes
Horror Game Kit supports multi-scenes in a project. Managing these scenes is straightforward and intuitive. Here's how you can create, edit, duplicate, delete, and organize your scenes.
Prefer a visual guide on scene creation and management? Check out the Multi-scenes in one project video.
Open Manage Scenes menu
To manage your scenes, open the Manage Scenes dropdown menu by clicking the scene name in the top left corner of the Studio interface. This menu lists all scenes in your project, enabling you to navigate between them by selecting each scene name. When you create a new project, it starts with one scene.

Create scenes
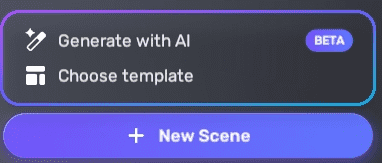
To add a new scene to your project:
-
Open the Manage Scenes menu.
-
Click the New Scene button. You can then choose to create a new scene either based on a template or with AI. To learn how to generate with AI, visit Generate horror scene with AI.
Edit, duplicate, or delete scenes
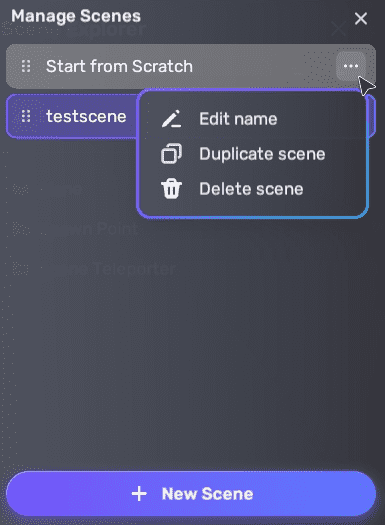
To edit, duplicate or delete a scene:
- Open the Manage Scenes menu.
- Click the More button next to the scene name and choose:
-
Edit name: Rename your scene for better organization.
-
Duplicate scene: Create a copy of the scene to reuse its setup.
-
Delete scene: Remove a scene, provided it is not the only one in the project. Once a scene is deleted, it cannot be restored.
-
Rearrange scenes
The first scene listed in the Manage Scenes menu is the initial scene that players encounter in your game. You design the subsequent scene order using mechanics like the Scene Teleporter.
-
Open the Manage Scenes menu.
-
Drag the
 icon before each scene to move it up or down in the list.
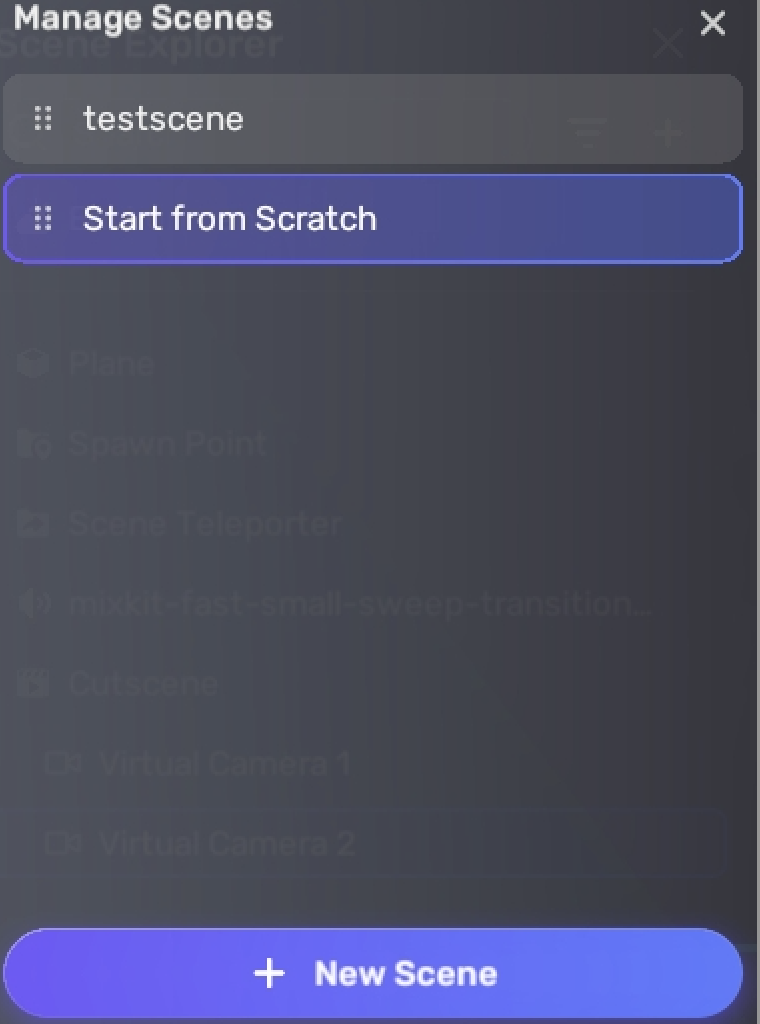
Related resources
To watch a video tutorial on scene management: